Let’s download (and assemble, and compile) Google’s Macintosh WebP converter
Note: this is a text in progress. In the next days I will download, install and compile Google’s code (or at least try to) and will keep a journal of all the steps I took to make it work on my Macintosh.
A couple of days ago Google updated the official homepage of WebP. Under the “WebP converter download” there’s an addition which seems to finally address the Macintosh platform and it is stated that you can now “Download webpconv for Linux, Windows/Cygwin or Mac OS X.” (the emphasis is mine)

Alas, if you follow the provided link, all you get is a list of steps to follow to try and install the infrastructure and then to create your own executable of webpconv. Not only it’s a command line version but there is yet no downloadable binary, no ready to use version of the program.
And it seems that I’m not the only one to be a bit miffled. This is a recent message on the WebP Discussion group:
I’d like to convert images to WebP but these instructions are confusing. I know little to nothing about Linux and the instructions have clearly been set up for experienced Linux users. From a user- centered point of view: when you have a link ‘download’, I expect a ready to go installation file which does all the installing and configuring for me. Now the links point to pages containing even more links which have to be downloaded with Git which is also a Linux program. Don’t you guys have desktop app or a PHP extension?
He’s got a point, hasn’t he?
Actually there are at least two alternatives for the Macintosh platform and they are really easy to use, although they both involve commercial software:
- The first is a set of free plugins for the popular Adobe Photoshop program.
- The second is Pixelmator, which has a webp export option since October 2010 but requires Snow Leopard.
But what if you actually want just a converter? What if you don’t want to spend money and just want a a free tool to evaluate if the webp format really delivers what it promises?
Then let’s try to follow and explain the steps Google provides and see how straightforward is it to build the command line software.
First step: MacPorts
Download MacPort for your Mac OS X version from the MacPort site. MacPort requires the installation of Xcode available from Apple.
How do you know if you have got Xcode or not? Check in your Mac hard disk whether you have a “Developer” folder.
If the answer is no you can
- go find your Mac OS X installation media and use that to install the Xcode/developer tools and after that run Software Upgrade to update it to the last version
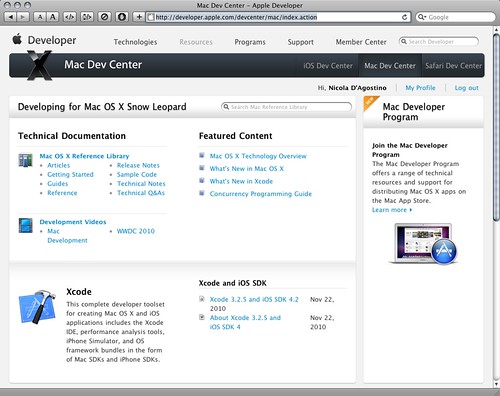
- Log into the Mac Dev Center with your Apple ID (an iTunes store should be fine but you have to register as a developer), download and install it
(warning: a reboot or two may be required)
Then (or if the answer is yes, you already have Xcode) download the appropriate version of MacPorts (it’s actually MacPorts with a final “s”, not MacPort as Google writes) from
http://distfiles.macports.org/MacPorts/
- If you have Mac OS X 10.6 (Snow Leopard) the most current version is
http://distfiles.macports.org/MacPorts/MacPorts-1.9.2-10.6-SnowLeopard.dmg - while if you have Mac OS X 10.5 (Leopard), like me, grab
http://distfiles.macports.org/MacPorts/MacPorts-1.9.2-10.5-Leopard.dmg
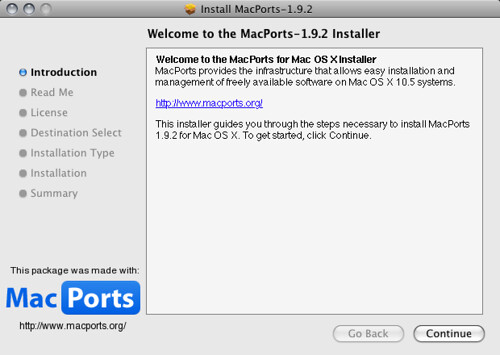
(If you want other ways to install MacPorts you can find all of the options at http://www.macports.org/install.php)
After the MacPorts installation (or if you already installed in the past) you will have to update it before proceeding.
To do this open the Terminal app (which is in /Applications/Utilites folder) or any equivalent and type (followed by enter):
sudo port selfupdate
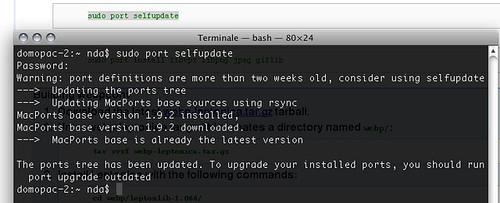
This command will ask you for a password and then execute a bunch of actions checking if you have the lastest available version and the “ports tree”, i.e. the list of installable software.
Second step: let’s install the required dependencies
Next is the installation through MacPorts libraries, system stuff that the webp converter will need to operate.
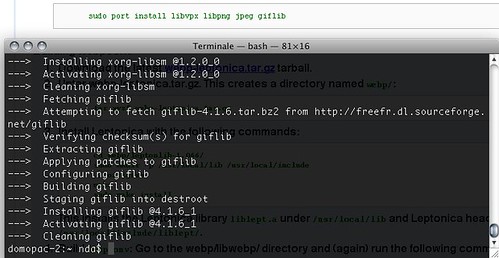
At the Terminal prompt of your Mac type (followed by enter):
sudo port install libvpx libpng jpeg giflib
This command will ask you for a password (unless you entered it not long ago) and then execute a bunch of actions such as downloading the source and compiling the required libraries (and their dependencies, which means related pieces of software).

(warning: this can take a while, even half an hour, and could start the Mac’s fans, especially if you have an older model)
Any problems?
During the second phase a number of problems can happen. Among them is the inability of MacPorts to download the sources for the libraries (if your Internet connection drops or the site cannot be reached) or if some requisites are not met.
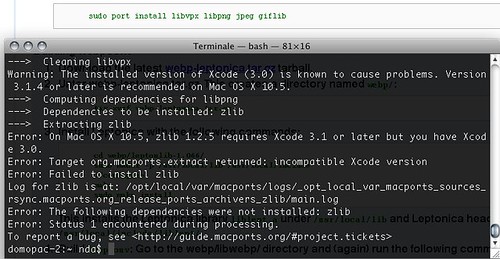
In this case, as you can see, “zlib 1.2.5 requires Xcode 3.1 or later but you have Xcode 3.0” so it won’t compile and install until you upgrade my Xcode.
(warning: Apple now officially provides and supports only Xcode 3.2.5 which requires Snow leopard.
If you have Leopard you will need to go to download “Xcode 3.1.4 Developer Tools” from a not-so-easy-to-find “Developer Tools” page)
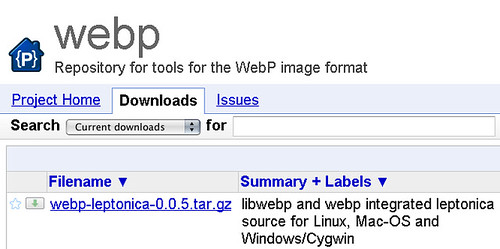
Third step: get the WebP and Leptonica library source code
The next step, to quote Google, is to
Download the latest webp-leptonica.tar.gz tarball.
Or, in other words, go to the “Download” section of the WebP project on Google Code and download a .gz compressed file with the source code for the converter and a required library, of which the latest version is 0.0.5.
After downloading, the file will have to “untarred”, i.e. uncompressed, which will create a directory named webp/
Open the Terminal and change your working directory to the same place where the .gz is (I suggest to place it in an easily accessible place such as your home directory).
Then issue the following command (followed by enter):
tar xvzf nameofthefile.gz
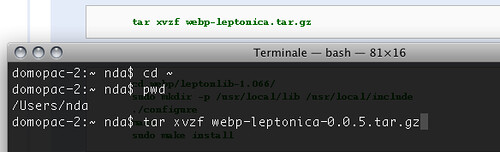
(warning: in Google’s WebP guide the command doesn’t match the name of the file -which changes with each version- so just copy the name of what you downloaded and paste it instead of nameofthefile.gz)
Fourth step: let’s install the Leptonica library
Now we have to configure, make and install the Leptonica Library, which will be needed by the actual WebP converter.
In the Terminal get into into the “leptonlib-1.066” subdirectory with this command (followed by enter):
cd webp/leptonlib-1.066/
(warning: as with the compressed file in step three the directory name can change with a new version so check the name and modify the “leptonlib-1.066” part accordingly)
Then issue the command (as always folloed by enter):
sudo mkdir -p /usr/local/lib /usr/local/include
and then:
./configure
If there are no errors you can give the following command (also suggested by the Terminal):
make
And finally if everything was fine and there were no errors you can install Leptonica with this command:
sudo make install
Any problems?
It’s very possible that during the configure, make or even the install part you will hit a snag.
This can happen during make:

Update: I received an answer from Vikas Arora who is one of the Google developers of the WebP project. This is what he suggested:
You can ignore these errors. Try following steps again:
make clean && ./configure && make && sudo make install;After this verify the contents/time_stamp for following files:
ls -al /usr/local/lib/liblept.a
ls -al /usr/local/include/liblept/*Once done, you can proceed to build libwebp
In my case it works up until the final webplib make (which should build the webpconv binary) but (again) make still does not work and exits with errors:

In the future
Althoug not resolutive Vikas Akora’s message ended with very good news for the future:
We are working on next version of libwebp that doesn’t have leptonica dependency. Stay tuned. Will let you inform as well.
This could help simplify and streamline the whole process and -hopefully- get a working webpconv binary in more Mac users’ hands.
(to be continued…)
![]()